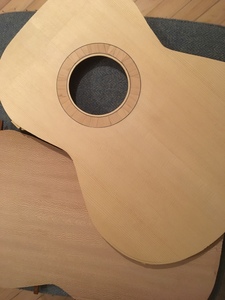
Cheers. Meant to say too that it is a 19" body based on a small 1950's Gibson with this beautiful shape.
Couple of areas of novice mistakes however- one of my back braces must not have been flat on the arch, so I have an area of non-contact on one stretch. Should I fill it? It is not mobile so I think there is enough glue at the contact points.
I chose to hide glue the half-lap X-brace joint due to a bit of over filing, which set before I could manipulate it flush to both sides of the bridge plate... tiny gap on one side unfortunately.
One last question:
The Platanus acerifolia (London Plane) I have for back & sides has the following spec on wood database ( https://www.wood-database.com/london-plane/). How do these data guide the soaking time for bending sides and final back thickness (currently right on 0.110")?
How do these data guide the soaking time for bending sides and final back thickness?
Absolutely no idea...but...
I have used Lacewood (London Plane) for sides and the bending was not a problem - V Easy...
Nowadays I just Dampen the sides just before bending - no need to soak for any length of time. Sometimes soaking for too long can damage the fibres and
I would leave the back at .110" - Lacewood (London Plane) is not as strong as Rosewood so my advice is: don't make it any thinner.
Should I fill it?
Your call...Maybe mask around and run a tiny amount of superglue in there?
Measure twice, cut once...
Final sand
I guess this red transformation is due to the hide glue on the X-brace, impregnating the PVA on the half-lap gause re-inforcement?
Ready to rope up, heel block gap closed as best as possible.
Wish I'd left a bit more sticking up, as I couldn't sand all of it.
Inner tube from a car tire from the local garage.
Trimming the plates on the recycled upside down manual drill press.
I needed a router collet extension to reach low enough on my jig.
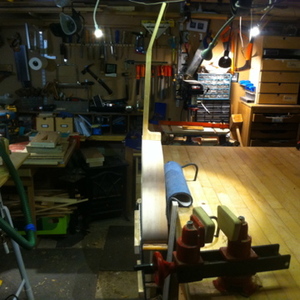
Craddle for assembled body fixed with steel holdfasts to bench.
Routed tailpiece channel
YES!! She's looking good...but 5mm is way too high...aim for 2mm
I think you should be able to reduce the angle OK and don't forget - You can push the neck in a little further to create a small step - this will be removed later on (or you can do it now if it helps).
It is a bit hard to see from here though - Those pics are super low res - can you upload a better one? - an angle like in that last pic would be good.
Measure twice, cut once...
Crappy digital technology I'm afraid.
This 2mm clearance- I would say- is not physically achievable, in the land of material science! The soundboard arching will always be in the way.
Leaving a bigger step at the body-neck junction just causes the bridge clearance to go up. >:(
Perhaps an exploratory sand of the under-fingerboard area is in order- but I can see myself going for ever to reach 2mm bridge clearance.
This is all a shame, because the neck joint is now almost perfect, and the heel is carved.
I've a feeling that there is still some confusion going on here...It is really difficult to work out the problem without some better images - you are more than welcome to pop round and bring it for me to look at - if at all feasable...cannot remember where you are but the offer is there...
Leaving a bigger step at the body-neck junction just causes the bridge clearance to go up. >:(
hmm ...Sounds a bit like you got the step going the wrong way...
Try pushing the neck in further so the body is a tiny bit higher than the neck fretboard gluing suface (up to about a 1mm or so)
You can sand the soundboard a little under the fretboard but make sure it is going to be in the right place and be very careful not to overdo it.
Be especially careful not to damage the rosette
If I was you I would try and get it down as close as possible without ruining anything and then move on.
If the final clearance is greater than 2mm then you could just make a chunkier bridge - not ideal but better than oversanding it to death...
arg..
I wish I could get a hold of it to see what is going on but I'm sure you'll work it out...
a couple of Q's:
Did you glue the heel block to the soundboard - on a flat workboard?
Did you assemble the soundboard using a radius board and go bar deck or did u stick to my method?
Measure twice, cut once...
No confusion Master- just hard reality of shapes!
Heel block was glued square to soundboard on flat workboard, using cam clamps.
I have the appropriate step in the soundboard, and a good gentle arch in top.
It is all as is intended right now, as far as I can understand. The soundhole will always push a straightedge upwards.
Would love to see how its possible.
OK - I slept on it ...here's what I think:
At 5mm the clearance is too high you need to reduce the angle
If you reduce the angle then you will have to sand the soundboard in the area of the rosette (this is OK if kept to a minimum - maybe .5mm to 1mm)
If I was you I would give it one more go - Try and get it as low as possible...then
After the fretboard is glued you can correct the angle as you level it - aim for aroung 8-9mm - fixed!
You could also make a chunkier bridge as I suggested earlier.
You will likely have to do a combination of all these things to nurse it into shape but that is not unusual...
Don't do anything too hasty - proceed with care - you're nearly there!
Don't forget the offer stands if you want to bring it round - OR Carol can organise a courier if you want to consider packing it up and sending it here - then I can get my hands on it and work out what is going on. You would not be the first - its a free service to MEMBERS ONLY!!
Measure twice, cut once...
I think I should prioritise getting the neck and soundboard flat, given that my fingerboard is only 5.55mm thick.
Nothing I have done with sanding the upper bout area on the soundboard has affected the bridge clearance- getting a reading under 5mm is just about possible, but I've sanded through the outside rosette purfling (just under the fingerboard), and left 1mm of spruce thickness at the heelblock. I had to re-adjust the heel joint, and take 1mm of the tenon. I've had quite enough of that destruction!
I do wonder what could have been built differently? Is it just the heelblock squareness to the soundboard?
I will get my bindings on this week- at least the router jig worked a treat, although quite terrifying.
Sounds like you have taken it as far as possible - I can't tell from that tiny image what went wrong but I suspect the arch of the braces is maybe a bit too much? Probably better to carry on and see if you can improve matters when leveling the fretboard. And use a chunkier bridge...
Measure twice, cut once...
Binding on.
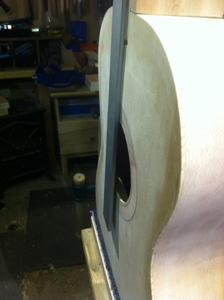
You can see on the side profile picture that the heel block to soundboard angle is slightly back set.
The soundboard is on the topside in this photo.
Guess somewhere between gluing the heel and arching the X-braces, I let the ball slip 🙁


