Lions, Tigers, & Bears! OH MY!!!!
🤣
On a more serious side someone shared this in their reply in a FB group I’m in. I plan to order the 12” & 16” radius bits later today. They’re $25.43
Dude that shared it said this about the bits.
”Here’s what I do. Zip, zip, done!”
Yonico Guitar Finger Board Radiusing Router Bit 12-Inch Radius 1/2-Inch Shank 13005 https://a.co/d/8FTUG5p
They have a set of 6 but I’m not sure I would ever need the smaller ones.
This brand also has a complete set of bits specifically for guitars. Wish I had seen this when I started. Still may buy that whole set though. Here it is.
Yonico Router Bits Set Electric Guitar Lutherie 8 Bit 1/2-Inch & 1/4-Inch Shank 14801 https://a.co/d/6JAzVMw
The set is $88.15. Yeah I may buy that today too. Hmmmmmm, decisions decisions. What do I do? 🤣🤣🤣🤣
right shoulder says, “buy it, you know you need every one of those bits.”
left shoulder says, “just hold on a minute. Save your money. You probably have half those bits already.”
🤦🏼♂️🤦🏼♂️🤦🏼♂️🤦🏼♂️🤣🤣🤣🤣
@Rathius
If you do decide to buy them, let us know what you think of them. I personally prefer to radius by hand with a combination of radius sanding block and a fret level beam.
I am curious how good this would work in practice ( jigging and setup of the router and all )
I bought something similar, many (10+) years ago.
I found mine being made and sold by someone out in Asia somewhere, maybe Vietnam or somewhere in that area.
It works. I made up a little jig to use with a friend’s bench router. Still needed to finish the fretboard by hand, but it removed a lot of the waste.
Online guitar making courses – guitarmaking.co.uk
@koendb the guy was doing it on his router table before profiling the neck. Lay it on its side with fretboard facing the bit and zip. Turned it over and ran the other side, second zip. And that’s his method. I’m thinking it’s worth a try.
@koendb I have a couple of these, a 12" and a 9.5" router bit. Works good if you are careful. It is important to get the fretboard centerline exactly parallel to the router table surface.
I built a little jig/sled and attach the fretboard with masking tape and superglue. (I make the fretboard taper first, before radius routing and before gluing it to the neck.)
The result does not exactly match any of the radius blocks I have, but the radius blocks are all a little different anyway.
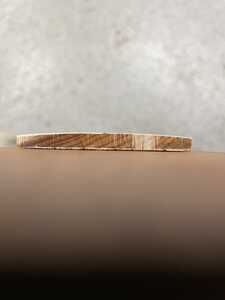
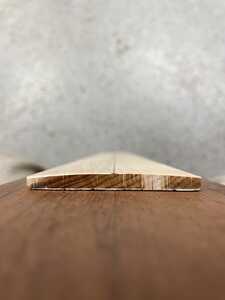
Ok so I just finished using the 12” radius bit and I have to say I love it. Yep. No more pre-radiused fretboards for me although I will still buy them pre-slotted. Just not ready to tackle that job just yet. 😁
I did leave a very slim bit of wood at the centerline but that’s ok. I’ll use the 12” radiused side of my aluminum radiused sanding block. It’s 16” radius on one side, 12” radius on the other. Here’s pictures.
Notice I haven’t profiled the fretboard yet. From here though, I’ll pull the fretboard off and carpet tape it to my neck profile pattern. I think y’all know the rest from there.
I highly recommend these bits. Makes it much easier & quicker. The block of mahogany the fretboard is attached to is a neck blank I had ordered last year from Stemac. Since I had never used it yet AND it’s planed on 3 sides 😁 I figured it was a very good candidate for the job of holding the fretboards to do this. It worked really well so it gets to stay just like it is. Shew, ends up being an expensive jig but, I’m ok with it. It works, don’t fix it. 🤣😁


