@markbailey That was probably part of the problem yesterday. Today I had better support but was still having trouble.
I figured out what was wrong and how it happened and then fixed the problem. I'll be uploading another video within the next day or two so you can see what happened. Frets are now in and super glue on one side is currently drying.
Good video thanks for sharing it with us. I’ve had that fret problem in the past where it goes down on one side. Could it be that the barbed part it too wide for the slot perhaps. I got round my problem by filing a small amount of the barb before installing.
Some people call me a tool, others are less complimentary. Tools being useful things.
@koendb just got back to forum, re; "Is that something common over where you live?"
This is something new to me. We moved up to this area after I retired, I've never heard of such a thing as a 'toolbox library' before this. It's a good idea; works for me. Although, I still haven't been able to rent the bandsaw. The person who had it last hasn't relinquished it yet...I broke down and used my jigsaw for some patterns - more cleanup! I can't move too far ahead with the neck until i can get the bandsaw - thus the other side of libraries...'the book's not returned - yet!'
It's all good - no worries, more time to play my Mandolin...lol, seriously...
<>< Poco7
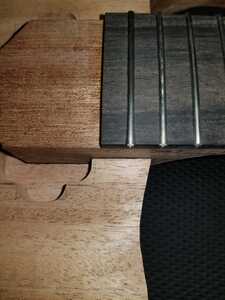
Routed the neck pocket today but not quite to full depth. Then I went to see how the neck would fit. That's when I was hit with a little disappointment. The neck heel sits loose in the pocket.
It actually doesn't start to fit snug until it reaches this point:
Shimming would probably be the best solution, right?
Shimming would probably be the best solution, right?
I think we've all done that, the neck can be a good tight fit in the routing template but the pocket ends up bigger. Take a shaving off an offcut with your plane and glue it in there. Just check where you need to shim to keep the neck in line.
Shimming would probably be the best solution, right?
@wayne_f Yeah, glue a veneer of equal thickness on each side of the neck heal. When dry, test fit the neck to see if you have glued enough veneer on. If it’s still loose, glue another piece on each side and test fit again when dry. If it’s too tight to get into the neck pocket, carefully sand the new neck veneer with 80 grit paper on a hard block. Be very careful not to sand one side more than the other, count your sanding strokes for each side, make sure they are equal. Also, make sure you sand level and flat, don’t sand unevenly. Constantly check with a small engineer’s square, the sides of the neck heal must be at 90 degrees with it’s base (the bottom of the heal). Keep test fitting it until you get a tight fit and make sure the neck heal goes deep enough into the pocket, you should test the scale length measurement from the face of the nut to where the scale length line is marked on the body (where the bridge will sit). Check the alignment as well by using long straight edges along the sides of the neck to the scale length line and make sure they measure equal distance from the centre line.
Yes it’s a pain but that’s what you have to do. Ask me how I know. 😂
You can do this, no sweat. 👍
Make guitars, not war 🌍✌️🎸
Okay. Problem solved. I made a couple shims and then glued and sanded them. Now the neck fits nice and snug like it should.
I've hit another speed bump. Yesterday I bought a small set of auger bits. I did a test on some scrap and the bit jammed up almost immediately. Today I went back to the store and bought a 7/8" spade bit to try that. That also wouldn't go through. I tried both corded and cordless drills and also my drill press but none of them could drive either bit through anything. None of the tools I have are powerful enough to use a bit that size. The smaller augers worked just fine (1/4" 3/8" 1/2") and same with smaller diameter wood boring bits. Nothing over 1/2" will go through anything. I might need a higher powered drill.
On the other hand, I did make some progress. Link holes, edge radius and belly carve are now done.
I tried both corded and cordless drills and also my drill press but none of them could drive either bit through anything
I use a forstner bit , but I never try to go through in one go, it ll get stuck pretty quickly , I always back off and go at it again, back and forth.
I can do that even with my cordless drill, provided there s enough juice left in the battery.
@wayne_f For reference for drilling the routing holes through the body I used a 10mm argur bit with a drill that has a max unloaded speed of 1650RPM and 65NM of tourqe. Apprectiate you dind't have an issue with a bit that small. For the jack socket I used the same drill with a 22m Spade bit, this is pretty close to your 7/8" one, point is it was absolutely fine and I'm only using a cordless drill, I'd suggest the bit you bought is simply just not sharp enough to be honest, good quality bits are cheaper than new drills!
Also be sure you're trying to go slowly when drilling big holes.
…on an elaborate journey to turn trees into music.
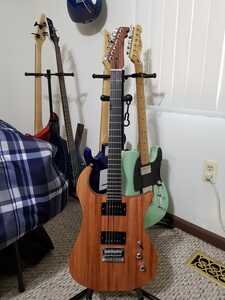
Here it is. The final installment of my guitar building saga. This video is a condensed recap of the entire build from start to finish.
I want to thank everyone in the community who helped and offered advice and, of course, I'd like to thank @markbailey for putting together this course and online community which helped me achieve this goal. Thank you all.
Looking forward to the next build.


