To embarrass myself...
 
Share:
Notifications
Clear all

To embarrass myself into finishing something ...

94 Posts
12 Users
393 Reactions
4,547 Views
Rocknroller912
(@rocknroller912)
Illustrious Member Customer
Luthier
Rep Points: 8406
Joined: 5 years ago
Posts: 1158
 

@tv101 

ok see you then. I will practice with my iPad and stand to get a good view.

Some people call me a tool, others are less complimentary. Tools being useful things.


Boo, Koendb, Robin and 2 people reacted
ReplyQuote
tv1
 tv1
(@tv101)
Illustrious Member Customer Registered
Luthier
Rep Points: 28066
Joined: 5 years ago
Posts: 3037
Topic starter  

thanks again Bill @rocknroller912 - I now have no more excuses for blunt gouges!!

Online guitar making courses – guitarmaking.co.uk


Boo, Koendb, Russ and 1 people reacted
ReplyQuote
Rocknroller912
(@rocknroller912)
Illustrious Member Customer
Luthier
Rep Points: 8406
Joined: 5 years ago
Posts: 1158
 

@tv101 

I hope can get a good edge on the power tool attachments.

Some people call me a tool, others are less complimentary. Tools being useful things.


Boo, Koendb, Russ and 2 people reacted
ReplyQuote
tv1
 tv1
(@tv101)
Illustrious Member Customer Registered
Luthier
Rep Points: 28066
Joined: 5 years ago
Posts: 3037
Topic starter  
Posted by: @rocknroller912

I hope can get a good edge on the power tool attachments.

I've had a first attempt on the belt sander.  I thought I had a selection of different grade belts, but apparently I've only got 180grit.  I used an old belt that was quite worn, and it definitely sharpened the gouge, but left the bevel quite scratched.  I'll get some higher grit belts before I do any more.

Thanks again

😀

Online guitar making courses – guitarmaking.co.uk


Boo, Koendb, Russ and 1 people reacted
ReplyQuote
tv1
 tv1
(@tv101)
Illustrious Member Customer Registered
Luthier
Rep Points: 28066
Joined: 5 years ago
Posts: 3037
Topic starter  
20220924 161953

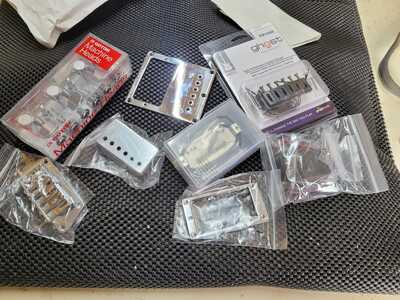
Postie delivered a few bits and pieces yesterday.

Online guitar making courses – guitarmaking.co.uk


Boo, Clinton, Koendb and 3 people reacted
ReplyQuote
tv1
 tv1
(@tv101)
Illustrious Member Customer Registered
Luthier
Rep Points: 28066
Joined: 5 years ago
Posts: 3037
Topic starter  

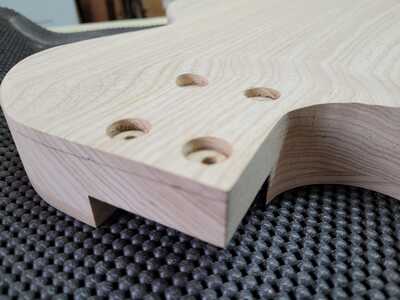
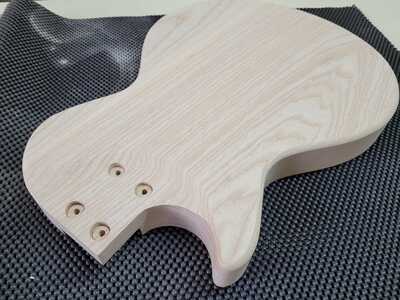
Tidied up the carving around the neck join

20220924 175639
20220924 175627


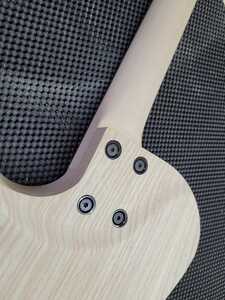
And got the captive nuts into the heel of the neck - in all the right places, properly vertical too.  

20220924 182714

That neck is going nowhere.

Online guitar making courses – guitarmaking.co.uk


Boo, Clinton, Koendb and 2 people reacted
ReplyQuote
Rocknroller912
(@rocknroller912)
Illustrious Member Customer
Luthier
Rep Points: 8406
Joined: 5 years ago
Posts: 1158
 

@tv101 

if you have any finer grade then try sticking some onto a flat surface and use that to take out the scratches 

Some people call me a tool, others are less complimentary. Tools being useful things.


Boo, Koendb, Russ and 2 people reacted
ReplyQuote
Rocknroller912
(@rocknroller912)
Illustrious Member Customer
Luthier
Rep Points: 8406
Joined: 5 years ago
Posts: 1158
 

@tv101 

That looks very good. I think I will start using bolts instead of screws

Some people call me a tool, others are less complimentary. Tools being useful things.


Boo, Koendb, Russ and 2 people reacted
ReplyQuote
tv1
 tv1
(@tv101)
Illustrious Member Customer Registered
Luthier
Rep Points: 28066
Joined: 5 years ago
Posts: 3037
Topic starter  

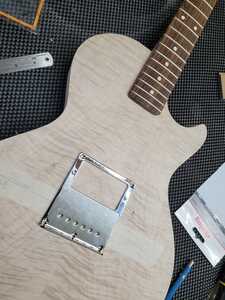
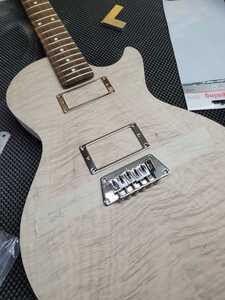
Option A

20220924 183231

I'll be putting a tappable HB in the bridge position - one of the bits postie brought was a chrome cover to put over the top of the black bobbin'd HB that I'll be using.


Option B

(I'd add the mini HB in the neck too)

20220924 183338


I'll be using the Graphtech Ghost saddles (piezo equipped), so thinking about whether OptionA or OptionB gives me a neater option to hide all the wires (the wires will go into the HB cavity on their way to the control cavity).

Online guitar making courses – guitarmaking.co.uk


Boo, Clinton, Koendb and 3 people reacted
ReplyQuote
tv1
 tv1
(@tv101)
Illustrious Member Customer Registered
Luthier
Rep Points: 28066
Joined: 5 years ago
Posts: 3037
Topic starter  

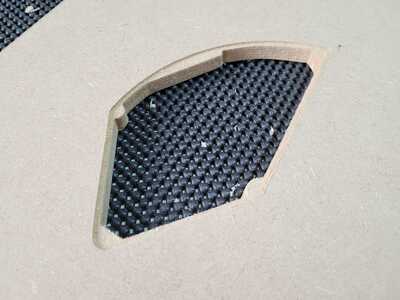
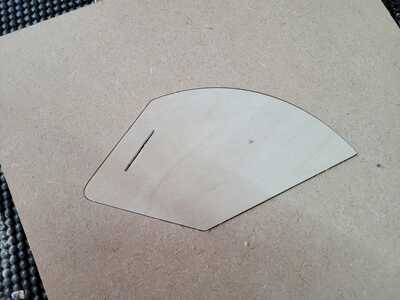
Did someone mention control cavity ??

20220924 175019

Yup, been playing with the CNC machine again!


20220924 175042

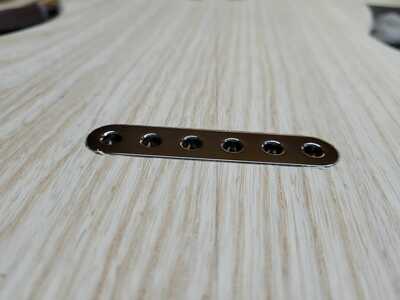
Not sure I've ever managed to get quite such a neat cavity cover fitting!  The slot in the top of the cover is a practice run for the pickup selector switch slot that I'll be using.  It won't really be poking out of the back of the cavity cover, I just used that practice piece to check the dimensions needed for the slot.

Online guitar making courses – guitarmaking.co.uk


Boo, Koendb, Rocknroller912 and 2 people reacted
ReplyQuote
tv1
 tv1
(@tv101)
Illustrious Member Customer Registered
Luthier
Rep Points: 28066
Joined: 5 years ago
Posts: 3037
Topic starter  
Posted by: @rocknroller912

if you have any finer grade then try sticking some onto a flat surface and use that to take out the scratches 

Good idea - I've got plenty of finer grade paper, I'll give it a go.

Online guitar making courses – guitarmaking.co.uk


Boo, Koendb, Russ and 2 people reacted
ReplyQuote
tv1
 tv1
(@tv101)
Illustrious Member Customer Registered
Luthier
Rep Points: 28066
Joined: 5 years ago
Posts: 3037
Topic starter  
Posted by: @rocknroller912

That looks very good. I think I will start using bolts instead of screws

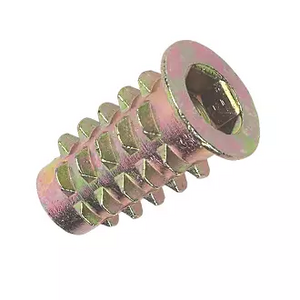
I've used this sort of thing in the neck heel

image

Once those are inserted, they're going nowhere, and you can remove and refix the neck as many times as you like, without worrying about the screw holes in the neck getting damaged / looser each time your screw the screws in / out.

The downside is that you have to be pretty precise when placing them into the heel - there's not a lot of "give" in the joint, and you're making 4 large-ish holes in the heel rather than the usual screw-sized hole, which is a lot easier to fill and redrill.

I've used M5 bolts, and the inserts needed an 8mm hole in the heel.  You've also got to place them perfectly perpendicular to the base of the heel.  

But once the job is done, it's a very solid joint, and I think recessed bolts look much neater than screws and a neck plate.

Online guitar making courses – guitarmaking.co.uk


Boo, Koendb, Russ and 2 people reacted
ReplyQuote
Koendb
(@koendb)
Famed Member
Luthier
Rep Points: 11634
Joined: 4 years ago
Posts: 778
 
Posted by: @rocknroller912

I can give you a demo if you want to video call me sometime.

I d be interested in that as well !


Boo, Russ and Robin reacted
ReplyQuote
Rocknroller912
(@rocknroller912)
Illustrious Member Customer
Luthier
Rep Points: 8406
Joined: 5 years ago
Posts: 1158
 

@koendb

 We can arrange something this weekend if you are free. Arrange a time on messenger.

Some people call me a tool, others are less complimentary. Tools being useful things.


Boo, tv1, Robin and 2 people reacted
ReplyQuote
tv1
 tv1
(@tv101)
Illustrious Member Customer Registered
Luthier
Rep Points: 28066
Joined: 5 years ago
Posts: 3037
Topic starter  

Amazingly, I got an hour in the workshop this afternoon.

Redrew the cavity and recut another test piece on the CNC, and then drew and test cut for the rear string ferrule block.  All tests completed successfully.  Doubtless, that means something will go horribly wrong when I put the guitar body on the CNC machine!

I’ve now got all the individual components tested on the CNC.  I could use the test pieces as templates and use a router as usual, but where’d the fun be in that!

Hopefully, next weekend I’ll get all the cavities ‘n’ bits CNC’d, then I can start on the finishing prep ...

Online guitar making courses – guitarmaking.co.uk


Boo, Koendb, Robin and 1 people reacted
ReplyQuote
tv1
 tv1
(@tv101)
Illustrious Member Customer Registered
Luthier
Rep Points: 28066
Joined: 5 years ago
Posts: 3037
Topic starter  

I also drilled through the string holes (body thru stringing).

Previously I’ve always used the drill press, but the bit has had a tendency to wander a little bit.  So I did it differently this time.


Pretty much spot on!

Online guitar making courses – guitarmaking.co.uk


Boo, Clinton, Koendb and 2 people reacted
ReplyQuote
Russ
 Russ
(@russ)
Illustrious Member Customer
Luthier
Rep Points: 29330
Joined: 5 years ago
Posts: 2558
 

Coming along nicely @tv101.  

🎸🎶🙏🙂

🗝️ "Life's what you make it"🗝️


Boo, Koendb, Robin and 1 people reacted
ReplyQuote
tv1
 tv1
(@tv101)
Illustrious Member Customer Registered
Luthier
Rep Points: 28066
Joined: 5 years ago
Posts: 3037
Topic starter  

I had some (wooden) window frames to repair, and then paint this weekend.

☹ 

Naturally, they were *upstairs* window frames, and I'm not a fan of climbing ladders.

☹☹

But with that job done, I grabbed a couple of hours in the workshop this afternoon.


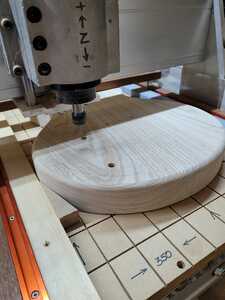
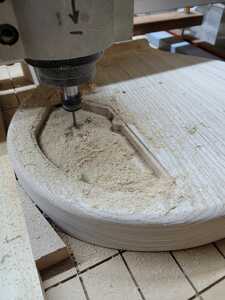
I checked, re-checked, checked again, stood back and thought about it, and then re-checked everything.  Many times.

But, eventually, it was time to let the sharp fast-spinning metal bit make contact with the wood.

20221009 174925sml
20221009 183717sml
20221009 192633sml

Online guitar making courses – guitarmaking.co.uk


Boo, Koendb, Robin and 1 people reacted
ReplyQuote
tv1
 tv1
(@tv101)
Illustrious Member Customer Registered
Luthier
Rep Points: 28066
Joined: 5 years ago
Posts: 3037
Topic starter  

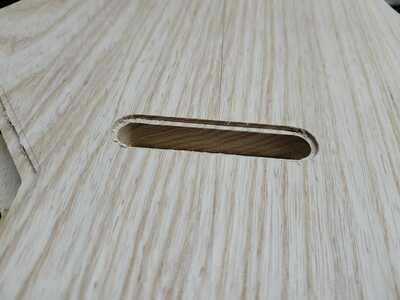
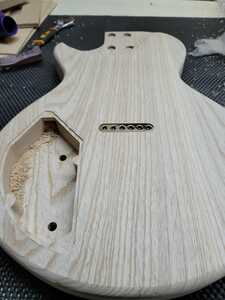
And this is what happened ...

20221009 192609sml

It took a lot longer than getting out the masking tape, superglue, and router - but part of that was my nervous learning curve with the software.

I still find the accuracy incredible.  If you draw it out accurately, and have got the correct cutter in the machine, it will cut to within fractions of a mm.

20221009 192617sml

Hopefully I should manage to get a lunch break this week, so I'll do the pickup cavities and drill through for the various wires.

Online guitar making courses – guitarmaking.co.uk


Boo, Koendb, Clinton and 2 people reacted
ReplyQuote
Russ
 Russ
(@russ)
Illustrious Member Customer
Luthier
Rep Points: 29330
Joined: 5 years ago
Posts: 2558
 

Looking great @tv101

🎸🙂🎶🙏

🗝️ "Life's what you make it"🗝️


Boo, Koendb and Robin reacted
ReplyQuote
Page 2 / 5
Share: