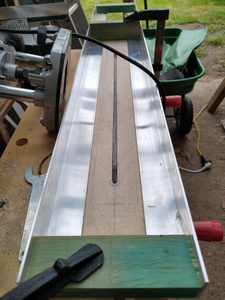
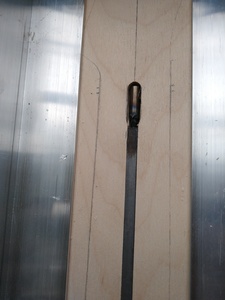
Last time I wanted to route a trussrod channel, I used the guiding rail from the router itself. While this did a perfect job on my first neck, but on the last one, I had some spots where the router bit went a bit off its path, leaving a pretty sloppy channel.
So today I made a very simple sledge for my plunge router with 2 aluminium profiles and a bit of timberwood.
I quickly tried it out and it seems to work perfectly.
It took me about 5 minutes to align and another 5 minutes to actually do this test routing.
Pretty happy with the clean and almost effortless result.
Now I want to sort out how I can expand on this sledge. It is also usable to thickness plane blanks. So I would definitely need to make some stops for underneath the sledge as well as a few stop blocks in the channel itself.
My idea was to make a few blocks, one inside the sledge , the other one underneath, and use bolts and wingnuts to clamp these two blocks together, on the profile. no need for strategically drilled holes , just a very simple clamping system.
Someone has other ideas?
@koendb nice job. As for a router planer jig there are a lot of examples of both diy ones and shop bought ones in the internet. Design is pretty much standard across them all. Someone did post one they made to sell on this forum too which might give you more info.
…on an elaborate journey to turn trees into music.
I am building a second shed to store pet foods and supplies, lawnmower and other gardening equipment. ( Actually I am throwing stuff out that does not belong in a guitar workshop 😋 )
And in between, I cant help doing something else, real quick 😎
Yesterday I made this planing jig. Perfect addition for my router sledge.
Today, I tried it out on raw piece of neck blank . It is a bit too small for a guitar neck, so I think this will be used for an ukulele.
Anyway, it s a twisted piece of wood ( Don't know what kind of wood it is ).
Sadly my phone ran out of juice during the next phase, so I have no action pictures.
I first hand planed one side, to stop it from wobbling. (Good opportunity to practice planing!)
Afterwards, I planed the neck blank with my newly made tools and the router.
I smoothed out the blank with a sanding block.
This is how it now looks


