Hey dude, jumping in at the deep end, eh? Don’t feel too bad, we‘ve all done it in one way or another...
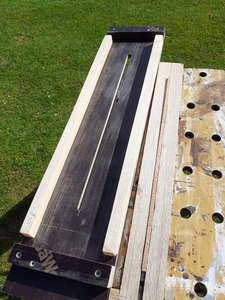
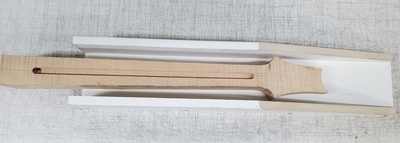
Cutting out your truss rod slot is definitely going to be harder than it needed to be but that jig you found looks pretty sweet, if you do decide to build and use that make sure you protect the sides of the neck from those screws.
In yesterday’s livestream, Mark pointed out that he accidentally cut out a neck profile without first routing the slot so he also has to figure a way to do it. He spoke about using a wedge shaped piece of scrap to index off of and perhaps you could just do the same?
Especially since in the future you‘ll probably be routing out the slot first before profiling and therefore wouldn’t need that jig anymore, just a thought.
Either way let us know what you come up with and how it goes, best of luck!
Cheers!
Practice on scrap...
That jig looks like a neat way of overcoming the problem.
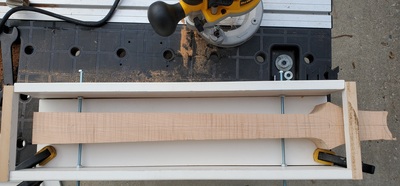
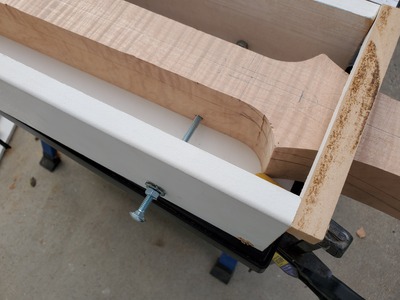
I'd probably put an extra nut on the end of the bolts - as big a nut as I could find - to spread the pressure over a wider area, and I'd also use some other pieces of mdf along the side of the neck, to spread the pressure even further.
Then you can hopefully tighten the bolts enough to hold the neck very tightly in place without risking damaging the sides.
Tape the neck down to the base plate of the jig too.
Fingers crossed ...
Online guitar making courses – guitarmaking.co.uk
Any thoughts on this or any better ideas of how to route out a truss rod channel on a neck that's already cut to shape?
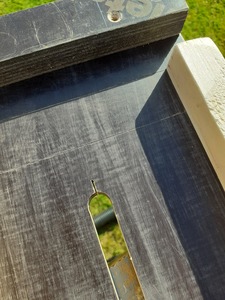
I made a jig to cut my truss rod slot, not because I cut the neck to shape, but because I couldn't route in straight line using my side giude. My jig was clamped to the top face of the neck. I might also have put a screw into the heel end. I put a little saw cut in each end of the slot to align with the centreline of the neck. The router base sits between the side rails and limited with the end stops.
I'm not claiming that it's better than yours, but it is another option. As Matt has already said, be careful not to dig these side screws in.
I forgot to mention, my neck blanks are each a little under 3" and I havent cut anything out on the back side so there is plenty of waste to put those bolts into if I make that jig. @robin your jig looks good too, I've seen others making something like it too.
So I made the jig today for cutting my truss rod slot. It turned out well. I drilled some small holes in the side of the neck to screw the bolts into and it worked very well.
I also started the build your own guitar course which has been pretty helpful. Followed the guide on making the headstock angle jig. I took off a little too much meat though, so I'll have to go back and deepen my truss rod channel. Glad to be learning all of this on this neck first.
I took off a little too much meat though, so I'll have to go back and deepen my truss rod channel
We've all been there and there's always a fix, (apart from the rare occasion that its firewood). Good work with the jig though, that will help to make i tidy job of deepening the slot.
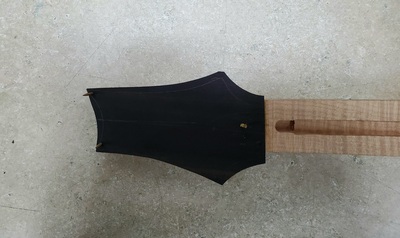
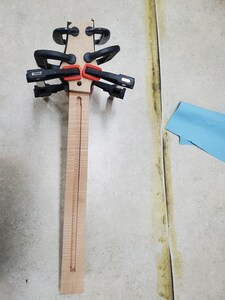
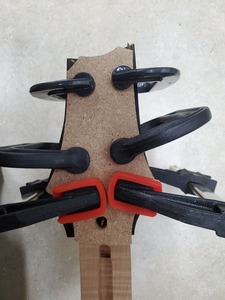
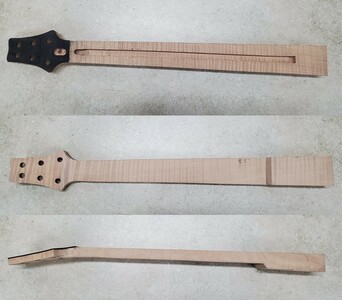
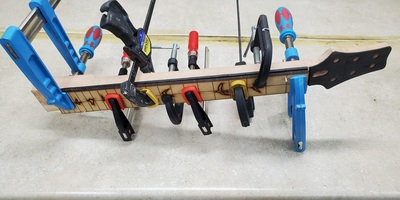
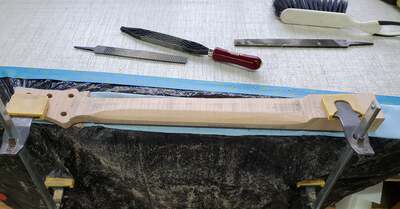
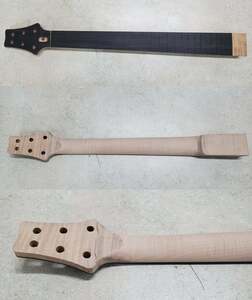
Was super busy last week so I didn't get to catch the livestreams or reupload, but I finally have more time, so today I got back to work. My truss rod is 12mm and originally I cut the truss rod channel with a 1/2" router bit. This was a little sloppy being .7mm too wide. So I ran the neck through the planer to get rid of the 1/2" slot. Thankfully these neck blanks are super thick. I bought a 12mm router bit and cut out the section for the truss rod and used a 3/8" bit for where the nut is. It turned out well and then I used the router to cut the angle into the headstock. I saw a video from A.D. Finlayson guitars on youtube. He does a lot of hand built PRS style guitars so I followed his process for the ebony headstock veneer. Got it clamped and now it's set. Here's some photos of the progress. No worries on the top two toothpicks. This one is getting the Santana headstock which will cut off where they're drilled in.
@94dodgedude It’s all good work man, you really should sign up for premium though, you’ll save yourself a lot of time and energy. That leaves more time to build more guitars. 🤘😁🤘
Make guitars, not war 🌍✌️🎸
I signed up as a premium member a few weeks ago, but I didn't see a section in the build your own guitar course on headstock veneer. Maybe I didn't look everything over. But the videos on that course have been really helpful. I'm just having to adapt since I started before finding this channel and I started in the wrong order.
I am pretty sure that you will find that very few guitars are ever built 'in the right order'! We get distracted, we want to see how the next bit will look, we forget to drill holes - important holes, and then put out 'please rescue me' messages on the forum! It's all part of the fun. The first guitar that I build that goes exactly according to plan, with every step completed in the 'correct' sequence will probably be my last!
I wish you luck my friend, you'll have a blast!
@94dodgedude Darren is right, we all do things in the wrong order sometimes because of distraction etc and no guitar building ever goes without problems. It’s how we learn from them and are able to fix them that is the skill of a guitar maker. @darrenking
I don’t think there is a course video included for headstock veneer but there is one on the Guitar Making YouTube channel, the live streams.
Make guitars, not war 🌍✌️🎸
Practice on scrap...
@mattbeels it's a stewmac truss rod: https://www.stewmac.com/luthier-tools-and-supplies/supplies/truss-rods/adjustable-truss-rods/u-channel-truss-rod.html
It's definitely bigger than others I've seen but I like my necks a little bit chunky so no problem there.
Oh right. I always forget about those.
I think they are similar to the classic Gotoh truss rods. I guess the idea behind them is that the u channel adds stiffness to the neck.
Practice on scrap...
So I got some more stuff done. I rough cut the neck out, drilled the tuning holes out (will be buying a drill press for the nicer neck), spindle sanded the headstock down to a close to final shape and cleaned up the truss rod access route. Got the fretboard glued on and now I've got the rest of the day to wait. Here's some photos of the progress so far.
Got off work early today so I decided to get going on the neck carve. I was shooting for my favorite asymmetrical neck carve which is on my PRS McCarty 594 as my profile pic. Took me about 3 hours and the course's instructions on facets worked beautifully. I still have to clean up the small volute and heel but she feels like a comfy neck now.
Finally got my fretboard inlays done. After lots of research and a base and upcut bit for my dremel I got my mother of pearl block inlays from StewMac put in. Now I've got to make the headstock inlay and get it done.
I didn't get it perfect, but I'm happy with it for my first time ever doing inlays.
I like those rectangular inlays, looks great.
Give up the news folks, it’s liberating!
I still have to clean up the small volute and heel but she feels like a comfy neck now.
That's what one of the most satisfying parts of the guitar build (IMHO) - carving the neck, and turning a lump of rectangular timber with sharp edges into something that fits comfortably in the hand, and just feels "right".
👍
Online guitar making courses – guitarmaking.co.uk


