I always like to learn something new on each build.
Often the "learn something new" is preceded by me ballsing something up, to which I then need to devise a cunning fix.
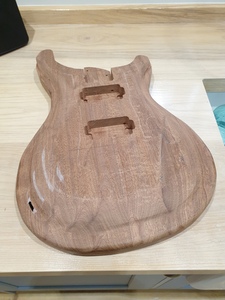
And here's the whoopsie on this build. It's a hollowbody, with the hollow created by routing out a large part of the 35mm thick top, onto which I've glued a 10mm back.
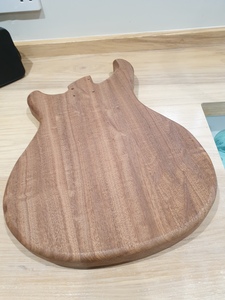
Back looks good ...
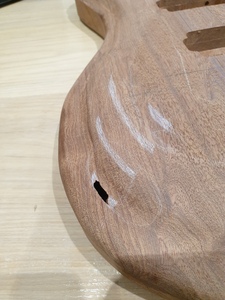
But due to a non-functioning ruler (or my inability to measure correctly), I've sanded into the inside of the body ...
... which is my opportunity to devise a cunning fix. The hole is about 15mm by 5mm.
My current thoughts;
1. Make it into an as-if-deliberate feature by cutting some matching holes in, more or less where I've indicated with the white pencil.
2. Hide it by cutting a hole in the back, gluing a piece of wood onto the underside and then filling the hole with wood dust & glue. Downside is that it'll still be quite obvious as there's some strong grain pattern running through the area, and I'll have to cut a hole in the back.
3. Hide it by inserting some inlay. I'd try to create some sort of semi-random pattern of inlays, and scatter them across the top of the guitar, rather than just into the hole. Downside is that I'll probably still need to glue a piece of wood onto the underside to support the inlay.
Any other suggestions oh wise ones?
Online guitar making courses – guitarmaking.co.uk
I'm currently attempted option 4.
That's like option 2, but without cutting a hole in the back to get access to the underside of the hole.
Step 1 has worked (I've got a piece of wood glued in place), and I've just applied step 2 (filling the gap). We'll see how - whether - that's worked in the morning ...
Online guitar making courses – guitarmaking.co.uk
That's bad luck...fingers crossed for the repair. At least you have option 1 as a fall back - and if all else fails
Measure twice, cut once...
OK ... here's whats happened so far.
1. A bit of precision sawing. I love my Japanese saws. This is a tiny piece of offcut.
2. Lets put a screw in it.
3. The screw is just to give something to hold onto when getting the offcut into place, and dolloping superglue on each end, then pulling it upwards to glue against the underside of the cap
Next task - mix up some wood glue and wood dust and smooth it over the hole.
That's all pretty much non-destructive. It it fails for any reason, then I'll probably go with the option of cutting some matching slits/fins into the rest of the cap and turn it into a feature.
Online guitar making courses – guitarmaking.co.uk
It took some time.
And then some more time.
Mix up the glue & wood dust, cover the hole, sand and then sand some more. Then mix up some more glue & wood dust and re-cover the hole, and then sand just enough (and not some more).
And ...
... hole? What hole??
Online guitar making courses – guitarmaking.co.uk
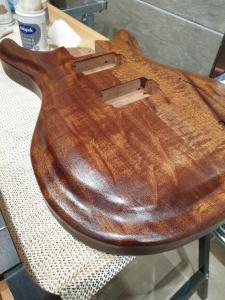
Count me happy with the outcome on this ...
But how about the back ...
I've long wanted to make a cavity cover that properly matched the grain of the body, and you'll not get a better match than that.
?
Points for anyone who figures out how I did it ...
(I've got a chromed string ferrule block to fit in the hole - recessed so it sits flush with the back of the body).
Online guitar making courses – guitarmaking.co.uk
@tv1010101 I've just been reading about inkjet waterslide transfers. Someone had made woodgrain effect transfers, I think it was for a model railway wagon. How about taking a photo of the cavity area before you route it. Then make a waterslide transfer using the photo, apply to your cavity cover and in theory you have a perfect match. Iv'e no idea if this would work, it's just a suggestion.
I think that would work!
I did something similar on this LPJr build ...
https://guitarmaking.co.uk/community/hints-tips/lp-jr-hiding-a-neck-join/
Took a photo of the neck join area, photoshopped it to extend the body grain pattern over the neck tenon (ie the neck tenon disappeared in the edited photo), then sent the image off to be printed on 3mm acrylic.
Cut the acrylic into the scratchplate shape, and job's a good 'un!
The trick was taking an accurate photo - it had to be perpendicular to the body to avoid any perspective effect in the finished article.
Online guitar making courses – guitarmaking.co.uk


