My first steps in b...
 
Share:
Notifications
Clear all

My first steps in building an acoustic guitar

193 Posts
15 Users
2116 Likes
4,928 Views
Koendb
(@koendb)
Famed Member
Luthier
Rep Points: 11547
Joined: 3 years ago
Posts: 766
Topic starter  

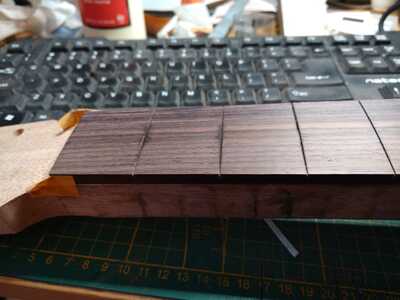
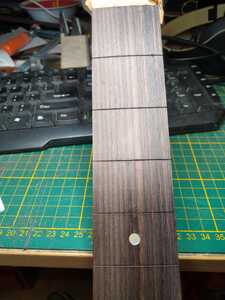
Success!! What dot? when dot? where dot? No superglue needed 🤗 

First attempt ( = beginners luck? )

IMG 20220202 145436156
IMG 20220202 160948571
IMG 20220202 161308054

   
Boo, Russ, Robin and 9 people reacted
ReplyQuote
Bpower
(@bpower)
Noble Member
Luthier
Rep Points: 3860
Joined: 3 years ago
Posts: 299
 

@koendb nicely done


Boo, Russ, Robin and 5 people reacted
ReplyQuote
tv1
 tv1
(@tv101)
Illustrious Member Customer Registered
Luthier
Rep Points: 27896
Joined: 4 years ago
Posts: 3017
 
Posted by: @koendb

This guitar will be called Dotty Parton.

The dots will need to be bigger.

Online guitar making courses – guitarmaking.co.uk


Boo, Russ, Robin and 7 people reacted
ReplyQuote
tv1
 tv1
(@tv101)
Illustrious Member Customer Registered
Luthier
Rep Points: 27896
Joined: 4 years ago
Posts: 3017
 

That fix is stunning - brilliant piece of work there Koen!

Online guitar making courses – guitarmaking.co.uk


Boo, Russ, Robin and 5 people reacted
ReplyQuote
Koendb
(@koendb)
Famed Member
Luthier
Rep Points: 11547
Joined: 3 years ago
Posts: 766
Topic starter  
Posted by: @tv101

The dots will need to be bigger.

Only two of them... (*bada boom tsssssss*)


Boo, Russ, Robin and 7 people reacted
ReplyQuote
Rocknroller912
(@rocknroller912)
Illustrious Member Customer
Luthier
Rep Points: 8383
Joined: 4 years ago
Posts: 1149
 

@koendb 
Excellent result, you are gaining confidence in your own ability which is going to move you up to another level of building. It looks like you have a good grain match also. So placing the new dot ?

Some people call me a tool, others are less complimentary. Tools being useful things.


Boo, Russ, Koendb and 7 people reacted
ReplyQuote
Rocknroller912
(@rocknroller912)
Illustrious Member Customer
Luthier
Rep Points: 8383
Joined: 4 years ago
Posts: 1149
 

@tv101 

The 2 dots wouldn’t be level with the fretboard would they. Flat would be no good. 
I’ve been on the Dolly Parton tour bus by the way, just thought I would throw that nugget in for no particular reason.

Some people call me a tool, others are less complimentary. Tools being useful things.


Boo, Russ, Koendb and 7 people reacted
ReplyQuote
tv1
 tv1
(@tv101)
Illustrious Member Customer Registered
Luthier
Rep Points: 27896
Joined: 4 years ago
Posts: 3017
 
Posted by: @rocknroller912

I’ve been on the Dolly Parton tour bus by the way

Joni will be jealous.


My only claim to famous person association is.

Online guitar making courses – guitarmaking.co.uk


Boo, Russ, Rocknroller912 and 7 people reacted
ReplyQuote
Koendb
(@koendb)
Famed Member
Luthier
Rep Points: 11547
Joined: 3 years ago
Posts: 766
Topic starter  
Posted by: @rocknroller912

It looks like you have a good grain match also. So placing the new dot ?

Yes, I used the off-cut from the sides of that fretboard, so the grain matched. + I used the piece that was between the same frets, so I only had to look at two dimensions, height and width.

I already punched for the new dot. Will measure again tomorrow and then drill and add the dot before starting my day job.

@rocknroller912 Thanks for persuading me to fix this . I could not be more happy following your advice.


Robin, Bpower, Boo and 7 people reacted
ReplyQuote
Koendb
(@koendb)
Famed Member
Luthier
Rep Points: 11547
Joined: 3 years ago
Posts: 766
Topic starter  

Dot is back! but it s now more on the spot where it should have been 😆 😆

Frets installed and I  made a headstock plate out of black veneer, 4 sheets glued together and glued to the headstock.

I loved how the black veneer made my logo pop on my Flying V build, so I am doing exactly the same here.
I still need to trim the edges

IMG 20220203 201042121

   
Robin, Rocknroller912, Bpower and 7 people reacted
ReplyQuote
Rocknroller912
(@rocknroller912)
Illustrious Member Customer
Luthier
Rep Points: 8383
Joined: 4 years ago
Posts: 1149
 

@koendb 

Good job

Some people call me a tool, others are less complimentary. Tools being useful things.


Russ, Robin, Boo and 5 people reacted
ReplyQuote
Koendb
(@koendb)
Famed Member
Luthier
Rep Points: 11547
Joined: 3 years ago
Posts: 766
Topic starter  

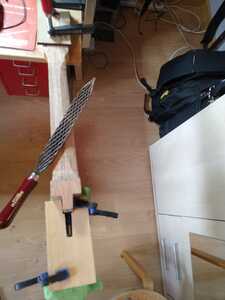
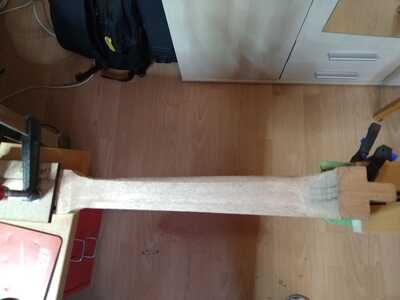
Neck Carving today!

IMG 20220204 105437536
IMG 20220204 115745605
IMG 20220204 125122976
IMG 20220204 125154602

 Perhaps I need to revisit the heel , but other than that I am happy with the result. It took a lot less energy then with previous necks I carved.
I assume it is because I felt pretty relaxed now.


Robin, Bpower, Russ and 5 people reacted
ReplyQuote
Koendb
(@koendb)
Famed Member
Luthier
Rep Points: 11547
Joined: 3 years ago
Posts: 766
Topic starter  

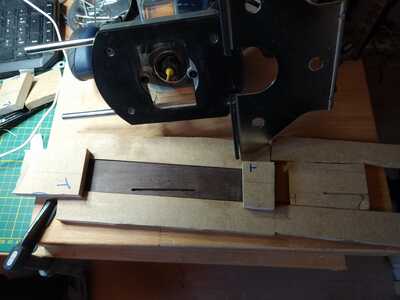
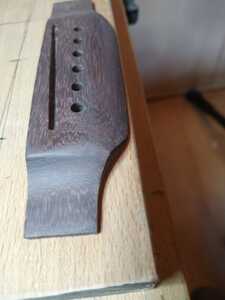
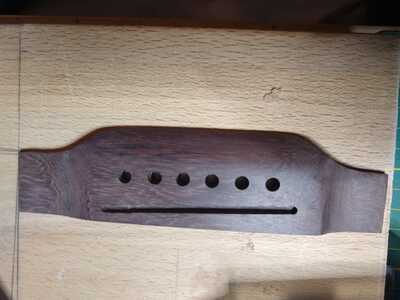
Yesterday evening I wanted to setup my saddle routing jig for today, only to realize I had the angle backwards. So I am now able to route saddle slots for left handed bridges 🤣 
Ofcourse, I glued, instead of screwing it all together 🤧 
So I improvised a temporary jig. Luckily This worked out fine. I was worried that my 3mm router bit would make the slot a tad to wide because the graphtech saddle, measured just under 3 mm with my calipers, even though that saddle is advertised as being 3.01mm.
Fortunately, the bit also measures just under 3mm with the same caliper. So it must be the caliper, being off even so slightly.
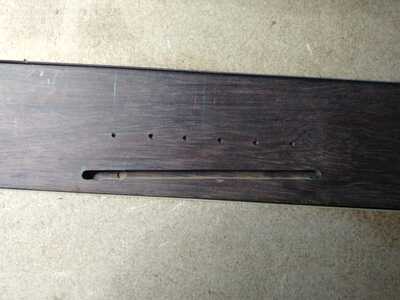
After a quick test run on the scrap wood ( right in the pic ) to assert that the saddle will fit properly, I ran the saddle slot, without any issue.

IMG 20220205 112545528
IMG 20220205 112552858
IMG 20220205 115045764

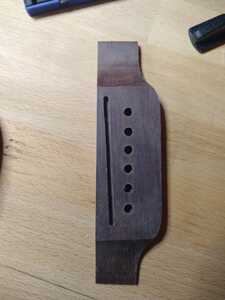
Then drilled the  holes with my pilar drill. I just took all the time to make sure I properly aligned the fence. Easy.

Up to carving the wings.. First of all, I cut off the sides way too short and could not get the curves the same on both sides. So they don't look even.
Not that it really matters, as the whole bridge won't be symetrical anyway.
The contour in the back, I am really happy with.

IMG 20220205 143121459

 After a lot of sanding, rasping and scraping, I got this result:


IMG 20220205 155933539
IMG 20220205 160838829

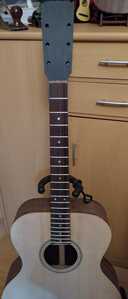
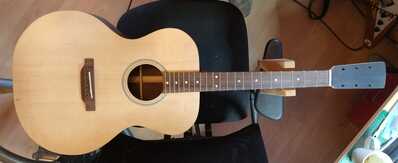
And this is how it looks on the guitar.
I prefer this to the ready made bridge I bought as a backup, should this bridge fail.

IMG 20220205 162538974

   
Robin, Russ, Boo and 5 people reacted
ReplyQuote
Rocknroller912
(@rocknroller912)
Illustrious Member Customer
Luthier
Rep Points: 8383
Joined: 4 years ago
Posts: 1149
 

@koendb 

You will have the strings on soon I think.

Some people call me a tool, others are less complimentary. Tools being useful things.


Robin, Russ, Boo and 7 people reacted
ReplyQuote
Koendb
(@koendb)
Famed Member
Luthier
Rep Points: 11547
Joined: 3 years ago
Posts: 766
Topic starter  

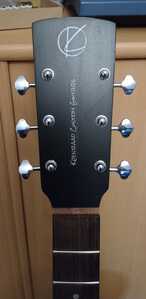
I put my logo and tuners on.
Not a huge success to be honest.
First of all, there where some air bubbles left underneath the waterslide decals, which I did not see until after I clearcoated 🙄 

I should have waited until this morning before putting the clear coat on , so, once again; Do not rush.

The biggest issue is the tuners on the treble side.. I knew the peg holes where a bit closer to the edge than on the bass side, but I did not realize how much that would be of an issue.

The tuners are on the very edge of the headstock.
The reason why there is such a difference is , that, while cutting out the headstocks rough shape on the bandsaw, I crossed the line on one spot and had to correct that line while sanding in a later stage.

I am not going to fix that right away, but I can always come back to it to plug the holes, redrill and even put another layer of veneer on top and redo the logo at the same time.

IMG 20220206 001346334
IMG 20220206 070142788

   
Robin, Rocknroller912, Clinton and 9 people reacted
ReplyQuote
Clinton
(@clinton)
Famed Member
Luthier
Rep Points: 4965
Joined: 4 years ago
Posts: 732
 

@koendb Woohaaa, brilliant!


Robin, Bpower, Russ and 7 people reacted
ReplyQuote
Boo
 Boo
(@boo)
Illustrious Member
Luthier
Rep Points: 34842
Joined: 5 years ago
Posts: 3831
 

That does look very nice indeed @koendb 👍

Make guitars, not war 🌍✌️🎸


Robin, Bpower, Russ and 5 people reacted
ReplyQuote
Koendb
(@koendb)
Famed Member
Luthier
Rep Points: 11547
Joined: 3 years ago
Posts: 766
Topic starter  

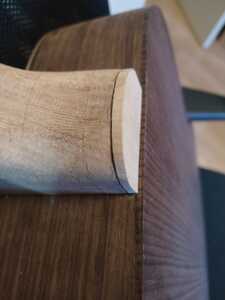
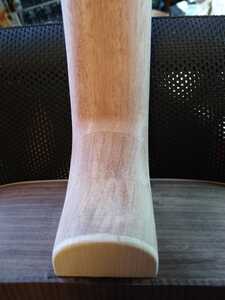
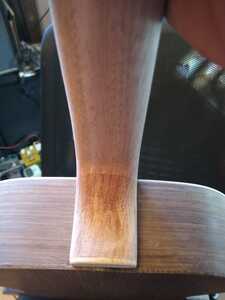
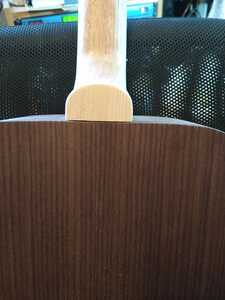
Today's work:
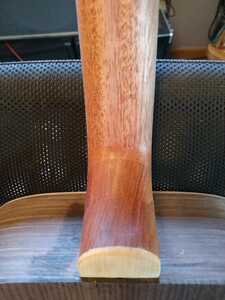
Making a maple heel cap and do a lot of scraping and sanding to get the heel and neck in better shape.

IMG 20220206 113033693
IMG 20220206 160458358
IMG 20220206 160527993
IMG 20220206 160541469

A Quick simulation with naptha to see how it might look when finished:

IMG 20220206 162202177

I also started sanding the body and fix little issues.

So I also ordered shellac and a transparent filler. Should I also oil the guitar? or just shellac?
I'm thinking to use mahogany filler on the neck and headstock back and sides, while using the transparent grain filler on the back and sides.


Robin, Bpower, Russ and 5 people reacted
ReplyQuote
Boo
 Boo
(@boo)
Illustrious Member
Luthier
Rep Points: 34842
Joined: 5 years ago
Posts: 3831
 

@koendb That is truly amazing work. 🙌

Make guitars, not war 🌍✌️🎸


Robin, Koendb, Bpower and 5 people reacted
ReplyQuote
Rocknroller912
(@rocknroller912)
Illustrious Member Customer
Luthier
Rep Points: 8383
Joined: 4 years ago
Posts: 1149
 

@koendb 

Be careful with adding extra veneer at a later stage as you might find it’s too thick for the tuners to fit. Very thin veneer over the back will cover the plugged holes but it would need to be paper thin.

Some people call me a tool, others are less complimentary. Tools being useful things.


Boo, Russ, Koendb and 3 people reacted
ReplyQuote
Page 8 / 10
Share: