Hi guys,
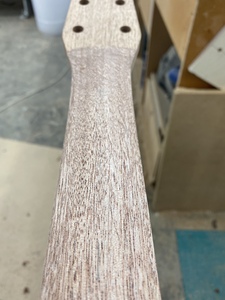
Before I commit it to the bandsaw (yes I'm doing this one by hand!!) any thoughts on how thick my neck should be at the body end? I have drawn it at about 16.5mm (excluding fretboard) but I'm worried it looks a bit thin. It is about 13.5mm at the nut. What do you think? Thicker at the body? Thinner at the nut? Fine as it is?
Cheers
Darren
@darrenking. Hi Darren, I'm new to all this but it does sound thin to me. When I watched Mark's neck carve he was aiming for around 20.5mm at the third fret and about 22.5 at the twelfth fret with the Fretboard. That is after the final sanding. 🤔 He does say that the neck can be thinner but doesn't recommend it to be too much thinner.
Cheers,
Russ
🙏🎸🎶🙂
🗝️ "Life's what you make it"🗝️
Before I commit it to the bandsaw (yes I'm doing this one by hand!!) any thoughts on how thick my neck should be at the body end? I have drawn it at about 16.5mm (excluding fretboard) but I'm worried it looks a bit thin. It is about 13.5mm at the nut. What do you think? Thicker at the body? Thinner at the nut? Fine as it is?
@darrenking Show us a pic and a vid Darren. 👍
Make guitars, not war 🌍✌️🎸
I have drawn it at about 16.5mm (excluding fretboard) but I'm worried it looks a bit thin. It is about 13.5mm at the nut
That's a lot thinner than I would dare. I used 20mm at 12 fret and 18mm at the nut before carving.
First job this year.
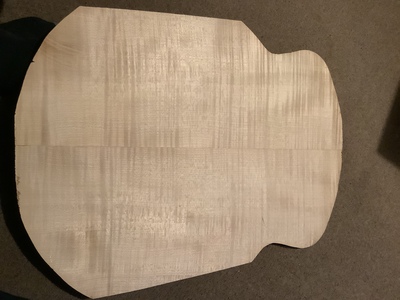
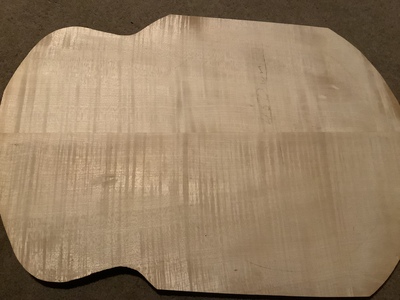
Flame maple top I bought last year. It had been pre owned and joined but the join had gaps and I was worried that carving around the top join would reveal a gap, so I separated it with hot iron over brown paper a while ago. Left it to stabilise for a while and yesterday planed the joint and glued again which was about two hours work. Planning to make an LP style. The flame didn’t match up very well side to side but the outline was already cut so there wasn’t any room to line it up better and keep the length.
Some people call me a tool, others are less complimentary. Tools being useful things.
The flame didn’t match up very well side to side
Remember that the flame is always going to be a negative book match ie one stripe will look light and the corresponding, opposite stripe will look dark. I have to say it looks pretty good to me. Once it’s got some finish on it it’s going to look gorgeous and there’s so much hardware going down the centreline any slight misalignment really won’t be noticeable.
Cheers
Darren
Yes I’m probably being a bit picky about the flame. I used to worry that I could never get the gluing surfaces to match exactly using a plane and always had to finish with a hand scraper. Then I watched Marks utube where he does the same, so another credit to Mark and Carol.
Thinking cap is on about how to make a pick up routing template for a curved surface.
Some people call me a tool, others are less complimentary. Tools being useful things.
@darrenking 18mm at the nut is really thin. Be careful that the truss rod does not poke out. I would not go less than 20mm.
Thinking cap is on about how to make a pick up routing template for a curved surface.
Route the pickup cavities before carving?
Practice on scrap...
Some people call me a tool, others are less complimentary. Tools being useful things.
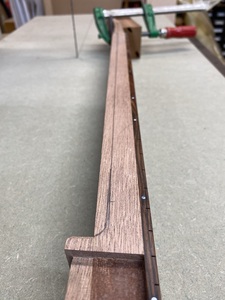
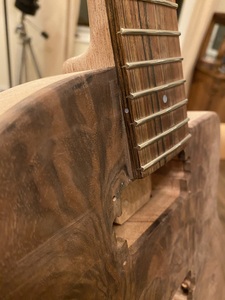
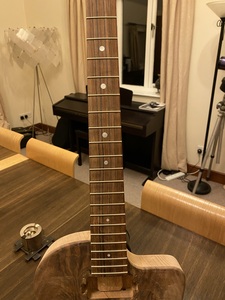
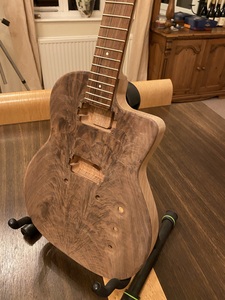
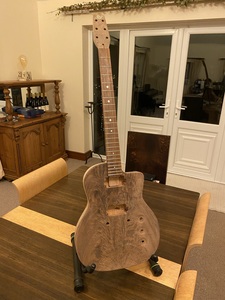
I stayed late at work last night to get the neck shaping more or less finished and the frets in (did I mention that I hate fret work). There is still a bit to be a bit of final filing, sanding and polishing to get rid of all the sharp bits on the ends but I’m pretty much at the point where I can glue the neck on so they will be todays tasks, and I might machine the back cover if I have time.
I am also going to make a little black/white/black lamination which will become the truss rod nut cover and also act as the stop for the nut.
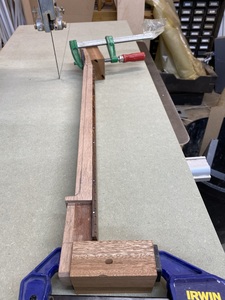
The first stage was to trim off the main excess from the back of the neck. To make this easier I clamped a couple of stabiliser blocks to the extremities which also allowed me to level it to the centre line. I then stuck a long piece of MDF to my band saw to extend the table.
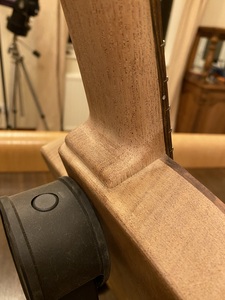
Then began the marking, faceting and shaping process which is always far less hard work in real life than it is to think about. I mainly used a large (20mm diameter) and small (8mm diameter) round microplaner ‘files’ for the most of the shaping. I just like that way that they cut rather than tear the wood as this means they leave the surface far closer to the finished shape than if I was then going to have to sand out all the torn fibres.
So this is where I have currently got to. The fretboard marker diameters are a further nod to the original Maccaferri.
More updates later.
Cheers
Darren
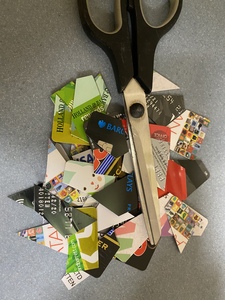
Bugger! My wife found my secret stash of credit cards used exclusively for guitar making related purchases!!
*IF* I had a secret stash of credit cards (which, for the record, I don't), and *IF* my wife found them (which, obviously, she won't, because I don't have any) ...
... it wouldn't be the cards that she chopped up and left on the floor.
😫 😫 😫
Online guitar making courses – guitarmaking.co.uk
So this is where I have currently got to
@darrenking. Looks Great Darren. You have very clean lines even with your hand carving. Love the shape. 👍😁
🙏🎶🙂🎸
🗝️ "Life's what you make it"🗝️
You may hate fretwork @darrenking but they look great to me, 👍
Practice on scrap...


