Some people call me a tool, others are less complimentary. Tools being useful things.
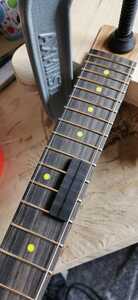
The yellow dots look good
@rocknroller912 Yeah, it was something different specified by the customer. I had to use non standard materials to get something so yellow and I have to use something completely different for the side dots (I need to test it first though.
Make guitars, not war 🌍✌️🎸
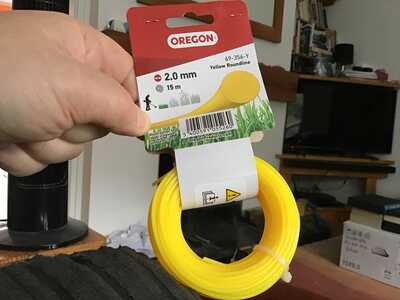
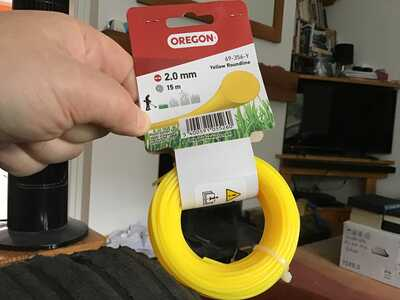
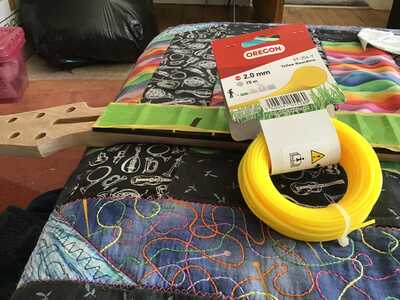
@rocknroller912 I’ve been trying to find some 2mm bright yellow plastic (or similar) rods so I can make some fret marker dots for the side of this neck. I’ve not been able to find anything that thin so I’m going to try and use some strimmer line/wire. I use it at work and is available in different gauges and shapes, it just so happens I use 2mm yellow, round line (I have some 3mm too for heavier cutting). I’ll try it this weekend.
Make guitars, not war 🌍✌️🎸
Good call on the side dots, it’s usually a plastic rod so it should work. I’ve been saving ebony off cuts from violin pegs for years thinking they will be good for maple fretboard dots but don’t think I will ever use them, so free to a good home if anybody wants some.
Some people call me a tool, others are less complimentary. Tools being useful things.
Ingenious
@russ I knew there would be a crossover somewhere between gardening and guitar making but this wasn’t an obvious one. On a Venn diagram, there isn’t going to be much depth, the circles will only just touch.
Make guitars, not war 🌍✌️🎸
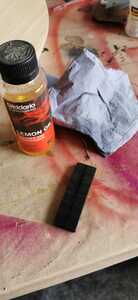
I’ll continue with this bandsman build today. I love how dark Ebony goes when lemon oil is applied. I put some on the fretboard offcut to show the difference, I can’t wait for the time when I can apply it to the whole board. Patience.
Make guitars, not war 🌍✌️🎸
I’M BACK BABY!
Im out at work today but when I get back I’ll be installing these bright yellow side dots on the neck.
Thanks for sorting my account out Mark et al, much appreciated.
Make guitars, not war 🌍✌️🎸
Time for paint!
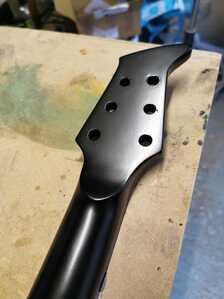
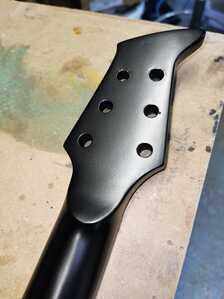
As I’ve said before, this customer wants his guitar in Matt black nitrocellulose (Nitro) paint, including the neck. So the neck is what I’m doing first. I’ve masked up, sprayed the black (to opacity), left it overnight, lightly sanded it with p600g, cleaned and sprayed with matt clear. Black is one of the hardest colours to paint as the prep work needs to be perfect and not getting any bloom in the paint is absolute. If any of this is not done right, it will show, really show. I think I’ve nailed it, the matt black looks great, no bloom and no bad prepping scratches. There are a couple of tiny imperfections due to a little detritus landing in the wet lacquer but nothing to worry about. There are some marks in the wood around where I tested the tuners but they will be covered up by the tuners when fitted.
I’m not showing off, I’m just stating how important it is to get the prep work right and the application of the paint is done right. The conditions were not ideal to say the least but I managed it, my customer is happy.
The temp was 21C (69.8F) - Not ideal
The relative humidity was 75% - Quite silly
I managed it but don’t spray in these conditions, especially with nitro. I did at first but I sorted it. 😉
Make guitars, not war 🌍✌️🎸
that looks absolutly fantastic @boo. Very clean. I have to admit... working with colours and sprays intimidate me more than building the guitar. My late father was an autobody mechanic/painter and left me all his tools that have been sitting in my shed for a while. I'm hoping to start trying to learn to use them on some future builds. 🙂
Looks fantastic @boo. When you're masking up the fretboard do you totally cover it or leave a tiny slither along the edge between the fretboard and the neck? How quickly do you take the tape off after the spraying is done?
🎶🎸🙏🙂
🗝️ "Life's what you make it"🗝️
Very clean. I have to admit... working with colours and sprays intimidate me more than building the guitar. My late father was an autobody mechanic/painter and left me all his tools that have been sitting in my shed for a while. I'm hoping to start trying to learn to use them on some future builds. 🙂
@bpower I come from an auto body painting background too, it’s not the easiest job but it is rewarding sometimes. I love using my knowledge and skill sets to bring to guitar building, painting guitars enables me to use different products and techniques I didn’t really use when I painted cars/bikes/vans/trucks etc. I used to colour match vehicles all the time and it can be very tricky sometimes. I’ve not got to the stage where I’ve had to colour match guitars yet, probably as repairs, but I’m sure it will happen in the future. So I think I will end up swapping repairing cars etc for repairing guitars. I am enjoying making guitars and giving them full spray jobs right now though and I get artistic licence on most.
It would be interesting to see what old tools you have from your dad, I can perhaps tell you what they are for and how to use them. They might not all come in handy for guitar making but some might. 👍
Make guitars, not war 🌍✌️🎸
When you're masking up the fretboard do you totally cover it or leave a tiny slither along the edge between the fretboard and the neck? How quickly do you take the tape off after the spraying is done?
@russ Thanks, I mask off most of the side of the fretboard but leave the tiniest amount showing so the paint will just cover where it joins the neck. It’s not worth risking trying to get the perfect mask line, exactly on the fretboard/neck joint.
I use several types of tapes to mask up with. I use normal 1” masking tape for the bulk of the fretboard but stop about 3mm from the edge where the fretboard joins the neck. I then use some 6mm “line tape” to go about .25mm from the join edge (maybe .5mm). Doing this enables the line tape to be removed easily after each spraying session and leave the rest of the masking in place. The paint leaves a sharp edge so at the start of each day, I remove the line tape and sand the whole thing (the whole paint job) with P600g paper (dry) lightly. Once I have sanded that sharp edge down carefully, I reapply a new load of line tape, accurately to the paint line. I can then spray more coats of paint/lacquer throughout the day. I will usually leave the line tape in place until the following morning and only remove the bulk of the main masking when all the painting is done and dry.
Using Nitro, I will leave the whole thing the dry and cure for about two weeks before sanding and polishing etc.
Make guitars, not war 🌍✌️🎸
I've been following your advice, wet sanding up through the grits, all it takes is time and patience.
@robin Whatever you are painting, a guitar, a car, a bike, a garage door, etc….. the top coat is the finishing coat, the sugar coating. It’s only part of a paint job.
Whatever the job, a paint job is made up of many layers, preparations and considerations, using various products and techniques to achieve the perfect surface to eventually lay down that final top coat finish.
From the substrate, you prepare each layer for the next one, and so on…..
Like you say, to achieve a good finish, it’s just a lot of patience, time and effort. There are no shortcuts to a great paint job!
Make guitars, not war 🌍✌️🎸
More great advice. Would you post a close-up picture of the line when it's completely finished?
@russ Yeah sure. When I go into the workshop today, I’ll show you the line tape, how I’ve applied it and take it off. I’ll then sand it, again, and then I’ll show you the reapplication of some new line tape. I’ll then spray a couple more coats of Matt lacquer on through the day.
Make guitars, not war 🌍✌️🎸


