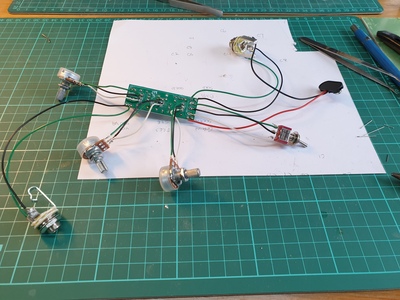
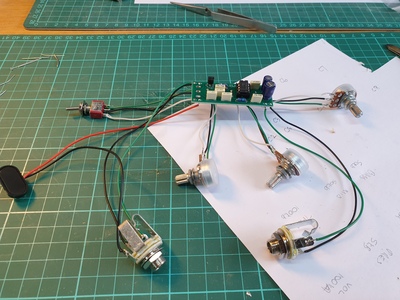
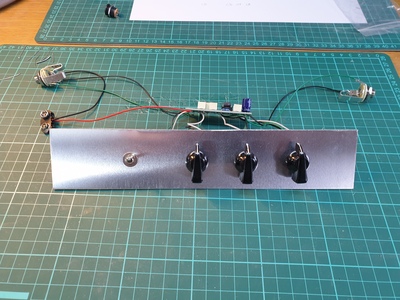
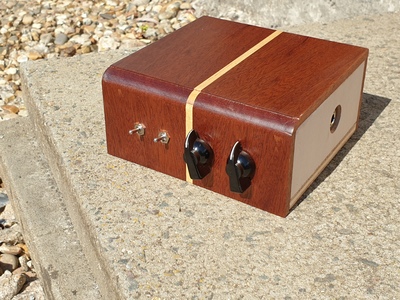
Made the faceplate.
Hopefully I'll get some time tomorrow to make a box for it.
And maybe even enough time to make a cabinet for a speaker too (that's a little more unlikely!).
Online guitar making courses – guitarmaking.co.uk
I love having a little workshop, with lots of odd bits & pieces, where I can just disappear for an hour or so and make things!
Very relaxing and satisfying.
I should probably check whether it works though ...
Online guitar making courses – guitarmaking.co.uk
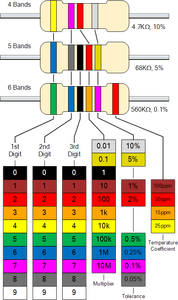
1k is denoted by brown-black-red-brown.
10k is denoted by brown-black-orange-brown.
Usually the last last ring on a resistor (usually slightly distance separated) is a tolerance band (although some may also be coded with a temperature co-efficient ring) and, bizarrely, brown (1%) is a higher tolerance than gold (5%), I'm guessing because high tolerance resistors were introduced after the gold and silver tolerance band values were already established. The final value ring ie the red on the 1k and the orange on the 10k denotes the number of 0's at the end of the value. Resistors are always colour coded in their ohms value. Larger, high power, resistors may actually have the value printed as text such as 4k7 or similar.
This colour code diagram is useful to keep pinned up somewhere if you are doing self-build electronics. Of course, the best way is to stick a multimeter on the component to double check. You do, thankfully rarely, get resistors marked with completely the wrong value (bored resistor factory worker's idea of a joke! ha bloody ha!! - actually more likely a manufacturing fault) and this can be more than enough to totally stuff up the function of whatever it is you are building. If you can get a multimeter with capacitance function then this is also really handy. It's a lot easier to check components before you solder them onto a board than it is to isolate a problem afterwards.
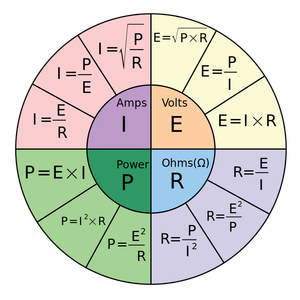
The ohms law wheel is another one that has been sellotaped to my notice board for as long as I can remember and is great, for example, for working out current draw on heater pads and so on ie 240w heater pad @ 24V = 10A, 360w heater pad @ 240V = 1.5A. Mostly important if using sub-mains voltage heater matts with a transformer, usually rated in VA (supply volts x output current). So a 240V transformer rated at 2000VA can supply a total of 8.3A at its output current(s).
Cheers
Darren
This colour code diagram is useful to keep pinned up somewhere if you are doing self-build electronics
Thanks @darrenking - the main challenge I have is deciphering the actual colours that are supposedly denoted by the coloured bands on the resistor.
Is that brown, or red? Gold, or orange? Sometimes even black or brown? !!
I end up using a magnifying glass, and checking under different lights to try to work them out.
But, yes, just using a multimeter would be a whole lot easier!!!
Online guitar making courses – guitarmaking.co.uk
@darrenking and @tv101 You two are talking black magic here, I have no clue. Keep it up chaps. 👍
Make guitars, not war 🌍✌️🎸
the main challenge I have is deciphering the actual colours
Yes, borderline colour blindness adds a completely new level of excitement to electronics projects and crap quality red ink doesn't help, hence the multimeter recommendation!
They are so cheap these days. This isn't a product recommendation, just something I found in two minutes on Amazon, but for less than £15 this would do everything a guitar builder could ever need, and more!
Oh man, resistors! Talk about fun. I have a Fieldpiece multimeter that I got from Stewmac years ago. It’s so basic and simple that I know how to use every setting. Yeah cuz it has about four of them, hah! Those regular NASA looking ones are for the guys who have their glasses taped back together, wear pocket protectors and smell like WD-40! 😆
Practice on scrap...
I should probably check whether it works though ...
Well, it didn't work.
😣 😡 😥 😪
So, time to rip it to pieces, and start again.
Except ... I'll just poke around a bit, wiggle a few things (connected to the amp) and see if anything changes.
It was - naturally enough - just about the last bit that I'd soldered into the circuit, being the power connections to the output jack. Thinking I'd be clever, I just proved how dumb I really am. Anyway, sorted that out, plugged in, and we're good to go.
😊 😊 😊 😊
And I know that's not really a "speaker cab", but it's the first stage of a speaker cab, and it helps keep the speaker in place while I test stuff!
Online guitar making courses – guitarmaking.co.uk
Next job is to make a pretty little box for the amp.
For the last one, I had some off cuts of thin mahogany lying around which was *almost* wide enough - hence the centre strip!
Don't have anything quite so fancy for this one, so I'm going to re-purpose the high quality packing materials that @darrenking uses when sending out fretting jigs ...
Those strips of ply are currently clamped to my bench to flatten them, then I'll make a simple box, for a simple amp. Simples!
Online guitar making courses – guitarmaking.co.uk
How does it sound so far?
It's a real lo-fi, low-wattage, basic amp! The controls are Grit, Gain, Tone and Volume. Tone doesn't do a lot, it's mainly about how dirty you want the sound to be!
Ridiculously, a 9v battery and that simple circuit will drive a 4x12 stack if you've got one (I don't). To be fair, it doesn't sound half bad through the 1x12 Marshall cab that I do have.
Really, I only made it for the fun of making it. I'll have some more fun making a pretty box to fit it into.
🙂
Online guitar making courses – guitarmaking.co.uk
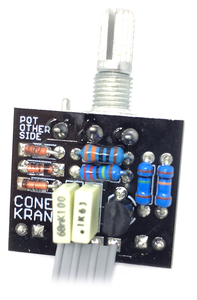
I also put this circuit together this afternoon
https://shop.pedalparts.co.uk/Cone_Cranker/p847124_18609185.aspx
That does "what it says on the tin" too - I've just plugged it in front of my little 5w valvey amp.
I'm half tempted to fit it into a guitar for some on-board electronickery.
Online guitar making courses – guitarmaking.co.uk


