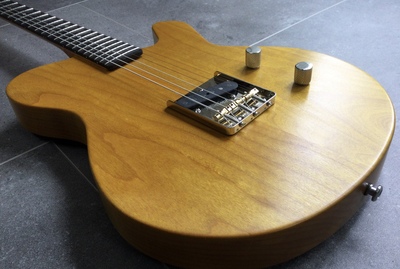
Hi Tej, I have used Osmo Hardwax Polyx oil for my last build. I stained an alder body yellow and then put 5 thin layers hardware oil over it. After applying a thin layer I waited about 12 hours for the next one. After last layer let it cure for about 5 days and then put a wax over it for some extra protection and shine. I also used it for the maple neck. Happy with the results. See pictures attached.
@bart-van-der-kemp Thanks, the finish looks good, not familiar with “hardware oil” have you got a link to the product please? Also did the oil alter the colour from when you stained it at all?
…on an elaborate journey to turn trees into music.
Hi Tej,
Autocorrection kicked in, it is Hardwax oil. A mixture of oil and wax, normally used on floors.
https://www.woodshopdirect.co.uk/interior-oils-waxes/osmo-3032-polyx-oil-clear-satin/
After staining I used another oil to get the intense yellow off a bit and also enhance the grain pattern. So that indeed changed the colour.
Then I started with the Hardwax oil. That did not change much anymore to the colour.
I liked it because it is a clean way of finishing, does not smell too bad and don't need air extraction.
After staining:
After applying oil:
After applying Osmo Hardwax oil 3032
I hope this will give an idea.
I actually just finish a lot of my builds with only shellac. I really like how my (shellac) finishes look and , more important, feel.
Now I am not doing a french polish or anything like that, I just put on a few (4 or 5 ) coats of shellac , spread over a couple of days, the neck gets a little bit more coats. I do aply most coats in a similar way as a french polish, I wrap a linnen cloth around a few cotton balls, dip that in shellac and rub the body and neck. If it gets to sticky, I use a drop of general purpose oil and continue.
I dont have High gloss finishes but the results are pretty much similar to @bart-van-der-kemp
Thanks for the ideas guys, as it happened I stumbled across a bottle of deep penetrating oil today which I’m going to test out over my dyed scrap. I think it’ll give a similar result to those posted. But will have to see how it goes. Hopefully it’ll work as I don’t really want to spend any more money on this particular build!!!
…on an elaborate journey to turn trees into music.
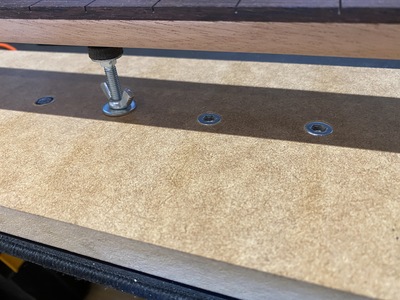
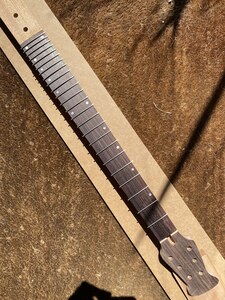
Progress very much ground to a halt again after life got in the way! I’ve modified the neck workboard now so it has a 4 threaded inserts in that I can screw a support into. The support I made from an M6 coach bolt that I superglued a section of a squash ball too and then sanded down the edges. I might need to take a little off the thickness out though as it gives a little. Should probably have used a harder rubber. From an initial test with a ruler the board is almost perfect in terms of being flat so very little sanding is going to be needed here. I’ll find out for sure later with my proper straight edge.
…on an elaborate journey to turn trees into music.
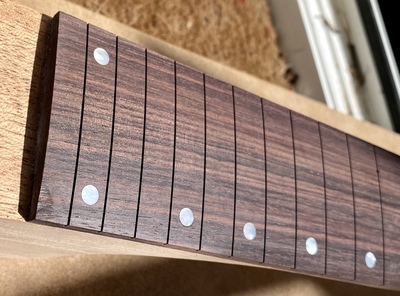
Dots are in, 5mm abalone. I used a depth stop on the drill bit to keep everything consistent as opposed to eyeing it in which worked a treat. For the super glue I let a small drip run down a cocktail stick so there was very minimal squeeze out onto the board. Really pleased with the outcome, only rough sanded flat at the moment so will look slightly cleaner eventually!
…on an elaborate journey to turn trees into music.
@koendb thank you 🙏
…on an elaborate journey to turn trees into music.
…not abalone, mother of Pearl! Oh for an edit function that works!?!?!?!
I’ve MOP for the side dots too but they’re very thin so need to make sure they’re only very marginally proud when glued in so I don’t wreck then cleaning up the side of the neck after fretting.
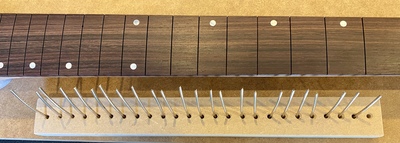
For anyone interested these are the stop collars I’ve used.
…on an elaborate journey to turn trees into music.
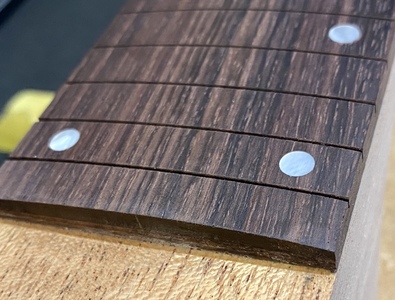
@markbailey This is the dent (bottom left) I was talking about. I’ll opt for the drop off water first and see if that helps before trying anything more severe!
…on an elaborate journey to turn trees into music.
Fingers x'd 🤞
The dent will raise as the water dries - sometimes it takes a few goes...
I'm sure whatever is left will easily sand out or come out when you round over the end.
Measure twice, cut once...
Neck looks beautiful BTW! 😲 👍
Measure twice, cut once...
Neck looks beautiful BTW! 😲 👍
Thanks, appreciate the comment! I’ve got a droplet sat on it now, presuming as the grain is pretty tight it’ll take a fair while to absorb.
Next job is to take a hammer and bash bits of metal into it, what could possibly go wrong 😑
…on an elaborate journey to turn trees into music.
…on an elaborate journey to turn trees into music.
…on an elaborate journey to turn trees into music.
Some people call me a tool, others are less complimentary. Tools being useful things.


