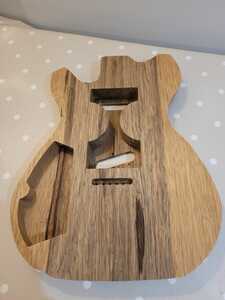
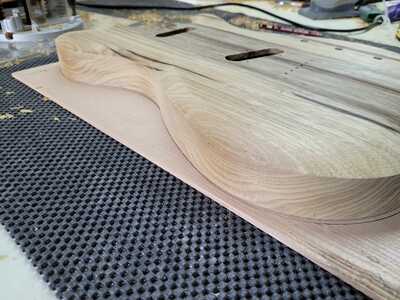
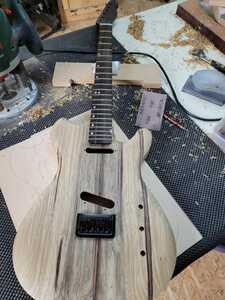
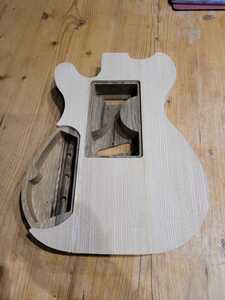
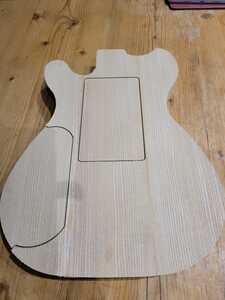
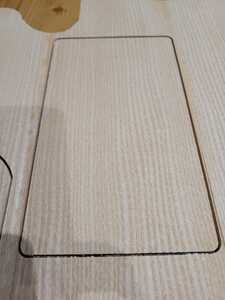
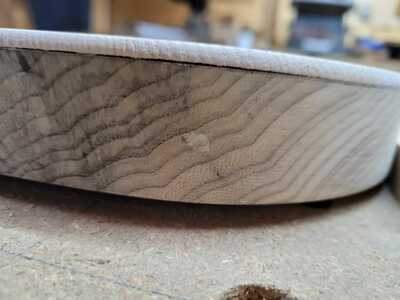
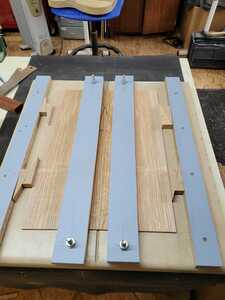
@tv101 ya know, I’m liking the sections that were left. Inlay some veneer in that middle section, stain the 2 raised sections ebony, then outside of those whatever color you’d want. The veneer could even extend downward beyond those raised sections to the edge. Maybe even flair out some. I could do all sorts of cool stuff with it just as it is. Wanna send me one? 😁
Been away all week - somewhere called "London". There are lots of people there.
So, no workshop time until this afternoon.
Are you sitting comfortably?
Let's start with a body blank
The challenge is not just to build a guitar, but to see how much of the job I can do on the CNC, and then to determine how much of the job was worth doing on the CNC!
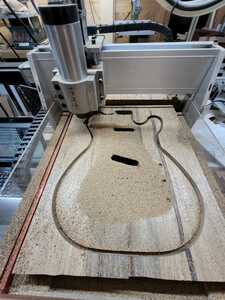
Decided to cut both front and rear on the CNC, which meant flipping the blank over midway through, and trying to get the zero point in *exactly* (ish) the right place. The toolpaths are all based from the zero point - they calculate all the X/Y/Z co-ords from the zero point. Flipping the guitar over part way through meant that I had to reset the zero point after the flip.
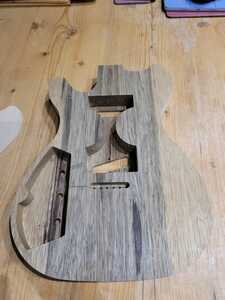
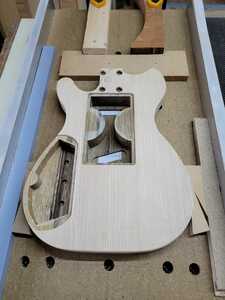
This is the back. I'm going to mount the pickups from the back, hence a nice big cavity. It's also a fairly weighty piece of timber, so the control cavity is going to be over-sized too, just to lose a bit of weight.
I'll put a back on the body (rather than a cap), and then try to cut out the cavity covers from the back (or underside cap).
It's also going to be string-thru, into a ferrule block set into the back. If you look at the ferrule block cavity above, you can see the string-thru holes which I part drilled from the back, and will part drill from the front.
If they meet up in the middle, it means I got my zero points aligned.
Fingers crossed ....
Online guitar making courses – guitarmaking.co.uk
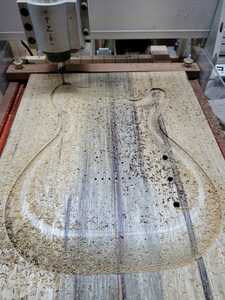
This is the top getting some CNC attention ...
And those are the string-thru holes drilled from the top. Did they match up???
I struggled with getting the carve coded into the machine properly. Probably took me longer to get that right than any other aspect. I managed to get up the learning curve, though I'm not entirely sure whether I took the right route!
But, it works ...
My CNC didn't quite have the height range I'd have liked. Another 50mm would have been handy, and would have meant that I could cut out the body entirely on the CNC. As I'd set it up, I had to cut the last 10mm of the cut-out channel on the bandsaw, which means I'll also need to tidy it up with the router.
That's a job for next week.
Online guitar making courses – guitarmaking.co.uk
Did the string holes match up?
Well, they're 3.175mm diameter and I couldn't get a 3mm drill bit through from front-to-back.
🙁
But, I could get a 2.5mm bit through
😀
So I'll take that as a success.
Still lots of sanding to do, and I need to prep and cut the back piece. But from blank to fully cut body took about 3hrs this afternoon. I reckon I can be more aggressive with the settings on the router, to take more off with each pass, and increase the feed-speed of the machine, but I'd rather not over-stress the machine or cutter.
Also, a useful learning, is that a CNC is pretty slow at cutting cavities (unless you have a mahoosive cutter). In future, I'll cut just deep enough to be able to use a bearing-guided router to take out the rest of the waste.
With those changes, I reckon a carved top body, with all the CNC'ing done would take ~90mins.
Online guitar making courses – guitarmaking.co.uk
That's a great wee toy you have there
Cheers @Russ
Conceptually, it's simple. It's just a router with a controller and 3 motors to move the router to the right place in the 3 dimensions.
The clever bit is the CAD software to design the thing that you want to cut - design in 3D - and then the logic that the translates the design into a toolpath for the router to follow. I'm still not bored of watching it work, it nips along quite quicky, nudging up/down, back/forward, left/right - clever stuff.
I've used it more for non-guitar (household) stuff since I got it. It's good for precision work, and would be really handy for doing - for example - detailed inlay work. Much more accurately, repeatably and way way more quickly, than doing that sort of work by hand.
Guess what I'm thinking of doing next
😉
Online guitar making courses – guitarmaking.co.uk
🗝️ "Life's what you make it"🗝️
Like this ...
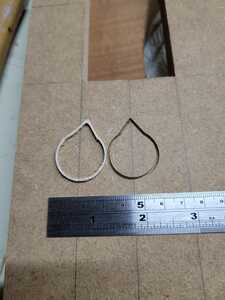
That "inlay" was about 1.5mm wide, cut out of 2mm thick ply, fitted into a slot cut into some MDF - just as a trial piece.
That's the sort of fine detail it can do.
Online guitar making courses – guitarmaking.co.uk
That's pretty precise
If I can cut something to within 1mm, then I'm happy! Trying to cut either the inlay - or the channel into which it was inlaid - by hand ... well, I recognise my own skill levels sufficiently well to realise that I'd never have been able to do either.
With the CNC machine, it's just a matter of making the shape with Mr Mouse, defining the toolpaths, setting them up in the correct order, securing the material on the cutter and then pressing "GO". By which I mean that it still takes a little bit of thinking, but as long as you do it all carefully and logically, then a successful outcome is a lot more likely.
🙂
Online guitar making courses – guitarmaking.co.uk
Thanks @jozefbehr
I should get some time to finish off the body this week. Get the routers out to trim off the excess that the CNC couldn't reach, and the sanding materials out to smooth out the cutter marks, prepare the backing piece and then it can be on to finishing.
I might try something else (the "inlay" comments above might be a bit of a clue!) but I'll see how the design work progresses before deciding on that ...
Online guitar making courses – guitarmaking.co.uk
WFH today, and my usual Monday lunchtime meeting was cancelled, so I got out to the workshop for 30mins.
Which is all it took to clean up the sides with the router and do some quick sanding to remove the tooling marks.
Thought I should also check that the neck fits nicely into the pocket, and aligns properly with the bridge at the right scale length!
Online guitar making courses – guitarmaking.co.uk
Got two separate escapes to the workshop today - work is quietening down now, so I switched off at 1630 and went back to do some fun stuff.
The rear is now ready for its cover. I deepened the control cavity slightly so the pots will now reach through.
The rear over is some 5mm Ash that I'd thicknessed (or thinned) and jointed a while ago. It was intended for another build, but that one never happened. So it's now "come in useful one day".
Now I just need to get some cheap black plastic cavity covers to cover the cavities ...
Unless ...
Now, I'm very possibly just a little bit biased, but I think this looks so much better than cheap black plastic cavity covers. Better even than expensive black plastic covers.
That was an hour's work on the CNC - including me swapping the cutter bits 3 times because the ultra thin ones snapped. Hence I ended up using a 1.5mm bit, hence the gap between the cavity covers and the rest of the rear cover.
Still nicer than black plastic though?
Online guitar making courses – guitarmaking.co.uk
Naturally and predictably, things haven't quite gone to plan.
The piece of Ash that I was used for the back didn't work out quite how I'd hoped. Though I only noticed that *after* I'd glued in place.
🙁
So now I need to get out the trusty surfacing bit and turn it into sawdust, and prep another piece to be the back "cap".
Which means another slight delay! I've got plenty of bits of timber that I can use, as I kept buying nice looking pieces of wood thinking that I'd use them as caps one day. Instead, I've ended up using solid wood instead - like this build.
Aiming to finish work on 16th Dec and not go back until the New Year, so I should have enough time to get this one finished over that period. Probably not before though ...
Online guitar making courses – guitarmaking.co.uk
Had a hectic last couple of weeks, trying to get finished at work in time for a decent long break over Christmas and New Year.
Today, is day #1 of holiday, and I'm not going back to work until 9th Jan
😊
So, back into the workshop this morning to pick up where I'd left off.
Online guitar making courses – guitarmaking.co.uk
This was the problem that I'd left myself.
Not sure whether the main body was slightly uneven, or the rear cap was uneven, or I just didn't get enough clamps on it.
Job #1 is to prepare another rear cap, so out with the Bailey jointing jig
That's been through the thicknesser, both sides, so should be pretty flat now.
Job #2 is to prepare the patient
Wedged in place (not that there a lot of horizontal force applied to it) and ready for the surgery
Online guitar making courses – guitarmaking.co.uk


